Managing permissions
Control user access in Fincome by setting roles and permissions. Define who sees which graphs or data tables. Assign roles like Admin or Member for tailored data access.
Mis à jour
Control user access in Fincome by setting roles and permissions. Define who sees which graphs or data tables. Assign roles like Admin or Member for tailored data access.
Mis à jour
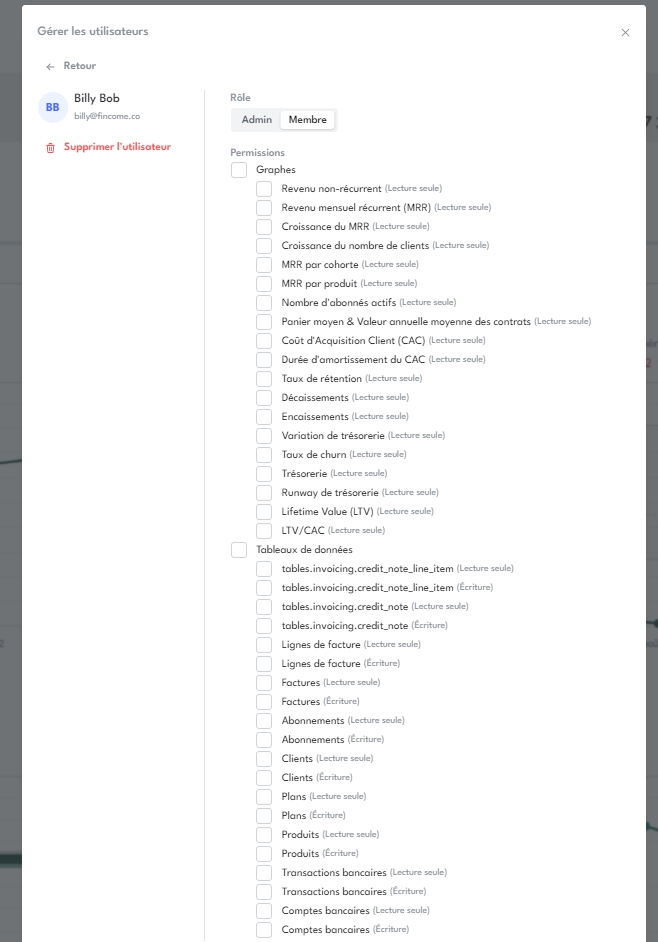
Fincome lets you set roles and access rights for each guest user in your space. This allows you to define precisely who can access a given graph or data table. This is particularly useful if : You wish to invite members of your team to consult only part of the data:
MRR and its growth for the Sales team, for example.
You don't want all invited employees to have access to certain data (salaries, cash balances, etc.).
You want to use Fincome as a data room to give potential investors a real-time view of your business, but you don't want to communicate your cash burn or cash runway.
You can assign 2 roles to guest users:
Admin: the admin has access to all graphs and underlying data, and can also invite other users and define their roles and permissions.
Member: the member has access only to data for which he/she has permission, and cannot invite other users or define their roles and permissions.
When you invite a new user with "member" status, you are taken to the permissions management interface, where you can define the graphs and data tables to which you wish to grant access.

Graphs correspond to the platform's various graphs. Data tables correspond to the tables accessible by clicking on a graph point, as well as the raw data tables available in the "Data" section of the interface.
You can modify a user's role and permissions at any time, as well as remove access to his or her account.